This week I’ll finish sharing the projects from our girls, INK “Celebrate The Everyday” class. This banner was created using several products from Stampin’ Up!’s Occasions Catalog: Perfect Pennants Framelits, Fresh Prints Designer Series Paper Stack, and the Spiral Flowers Original Die. You’ll probably notice some Burlap Ribbon, too. This banner is so easy to put together; let me just give you a few tips that will make assembling your roses a snap:
Break down the fibers in your cardstock by using a bone folder or pencil. Just run the tool over the paper several times and you will feel it soften. Start rolling your flower using the end of a pencil and then once you have a solid center started, go ahead a remove the pencil and keep forming the flower. Lastly, use a hot glue gun to attach the flower petals to the small circle at the end. If you don’t, the flower could come apart easily.
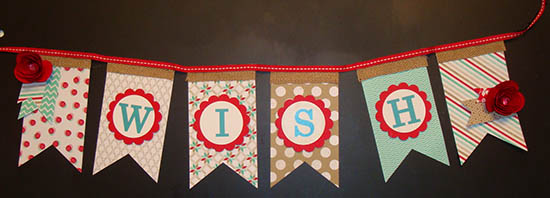
Did you think the letters forming “WISH” were stamped? They’re not! They were created using Stampin’ Up!’s My Digital Studio Software, by filling in a punch. If you have not looked into the fabulous product, you just might want to give a look:
